Hello! I’ve been spending some time every week working on a very cool rendering thing. I’ve thought of this rendering method by myself and then researched, only to find out that it’s been used before and to great effect, too! What is it?
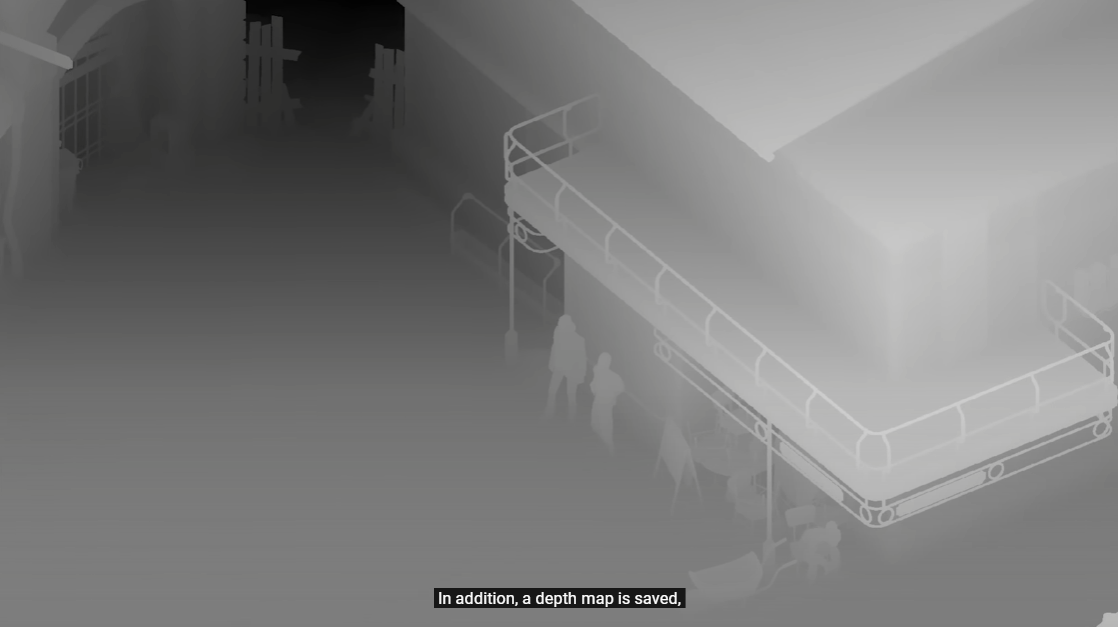
Well, imagine if a level in your game could be a single image, instead of a lot of 3D models – stylishly painted by hand. Imagine if the 3D models actually could walk around on that level, and have the level actually seem there, with correct depth perception. Imagine something like this:
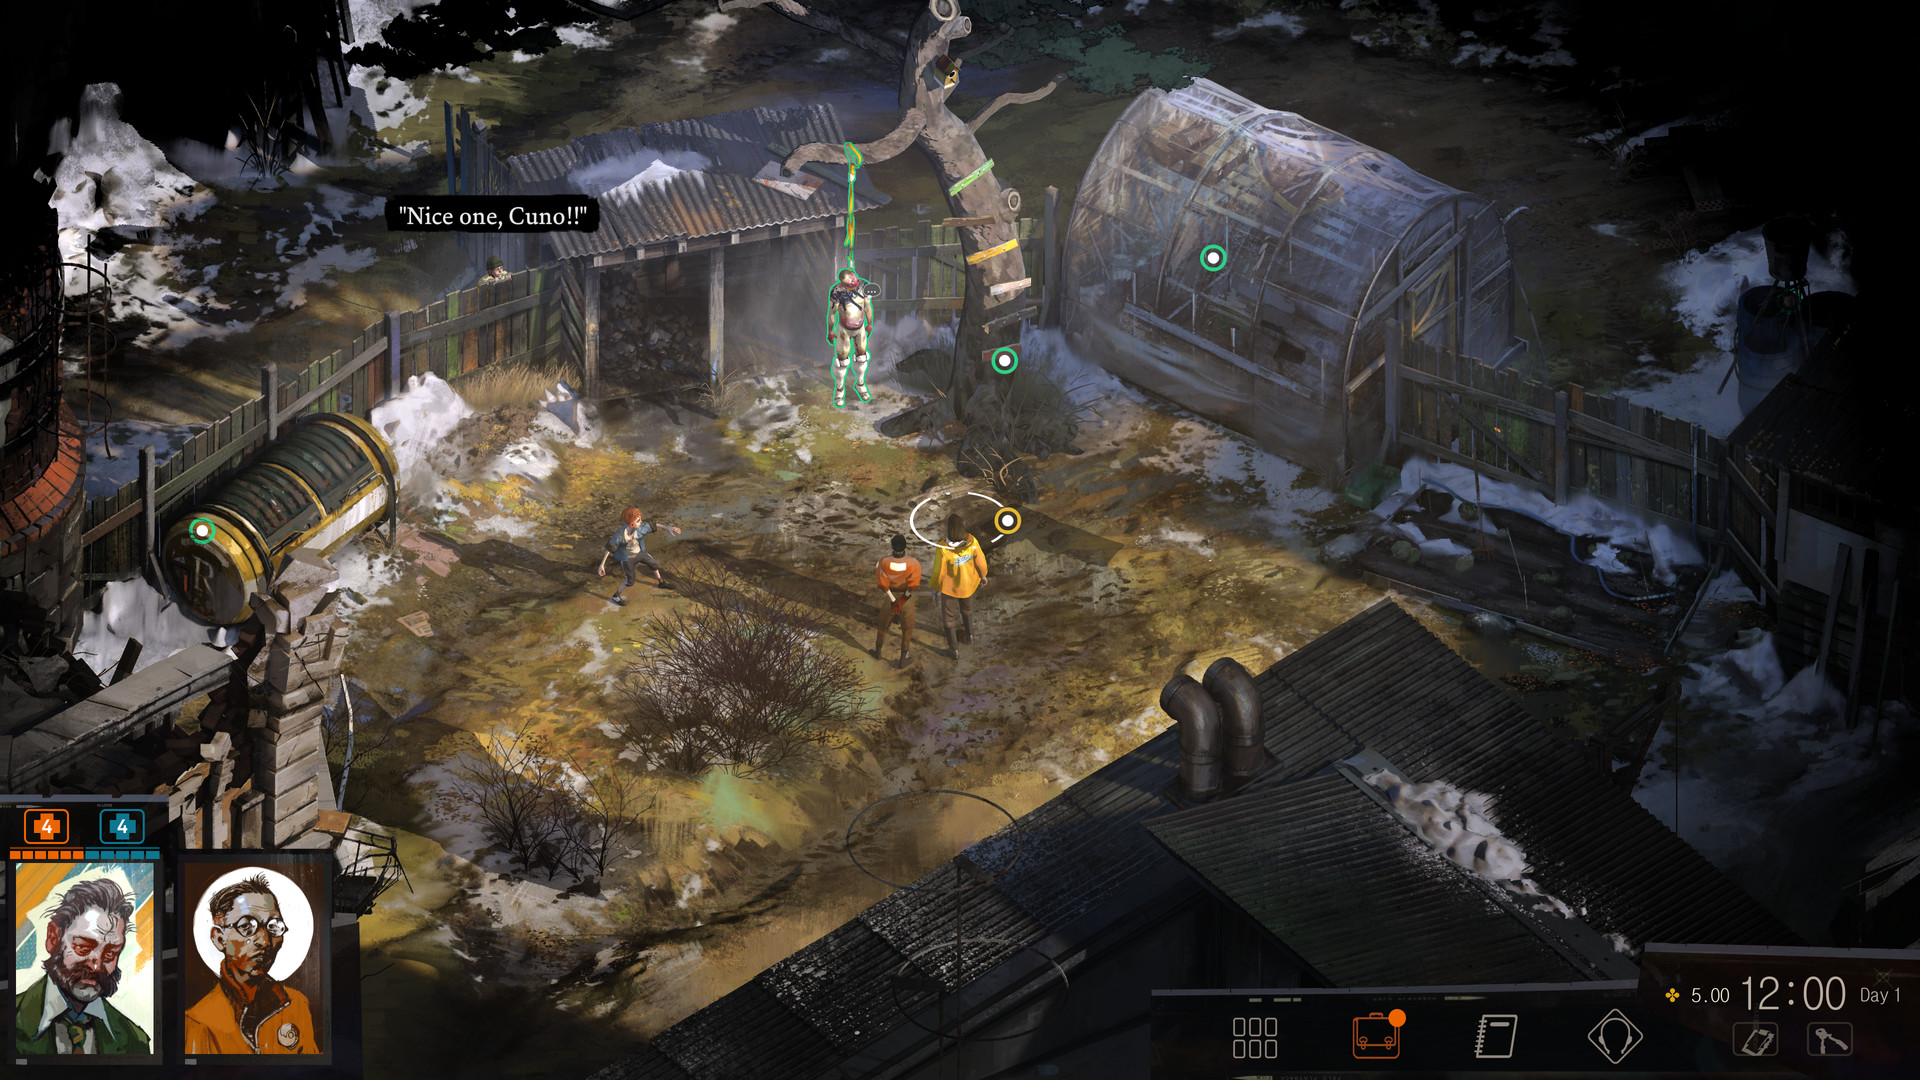
Everything you see except for the characters is 2D, and then faked very nicely! Let’s take a small look at what characters behind scenery look like:
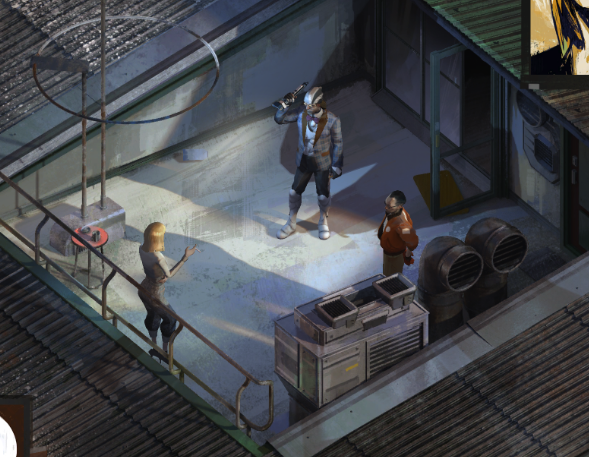
They are obscured very clearly, and you don’t even guess that the space isn’t magically 3D. Most of the things I’ve been researching come from this video (in Russian with subs), where the whole rendering method is explained. I’ll be pasting the most important parts here.
Here’s the “proof” that the level is a single image, first of all.
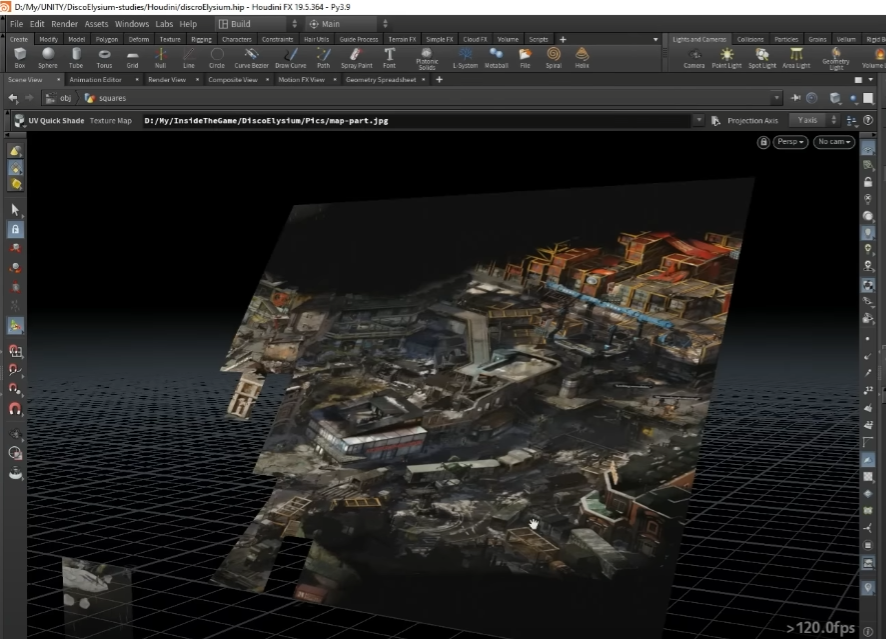
A very simple 3D model does exist, to be able to extract depth information from it:
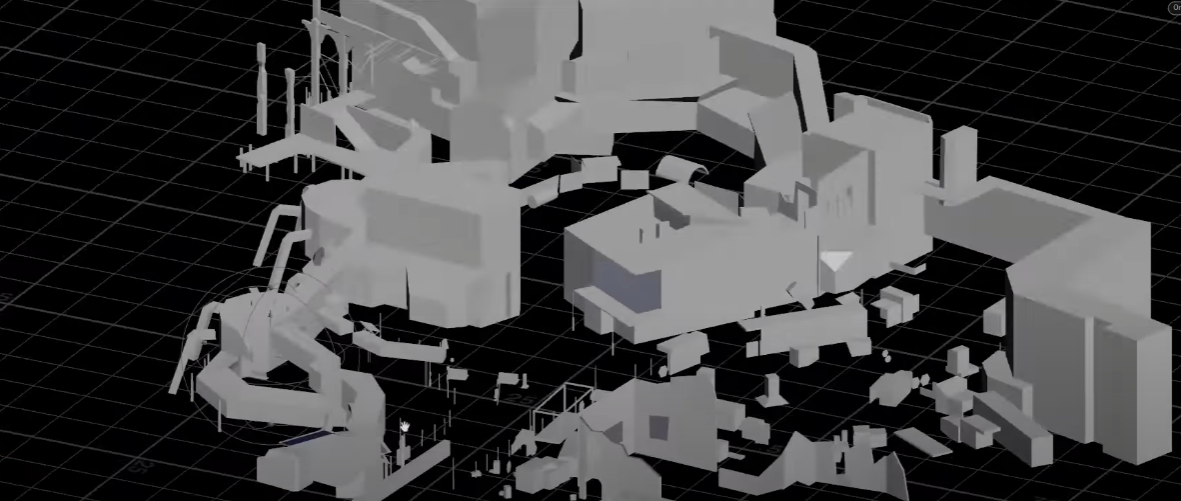
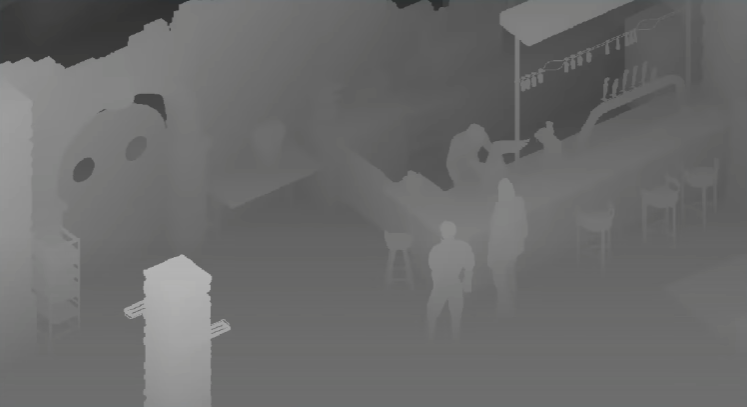
From here, a depth map is extracted, and looks something like this:
This is where the video goes into a renderdoc session and shows that we first render characters and 3D items:

After this, we put down the level, and it has depth (you can see by the differing grayscale values):
I’ll be skipping all the nice details about lighting and normals, etc. – we’re just talking about the problem of reconstructing 3D visibility by using 3D models in a space completely defined by a texture and a depth map.
Experiments!
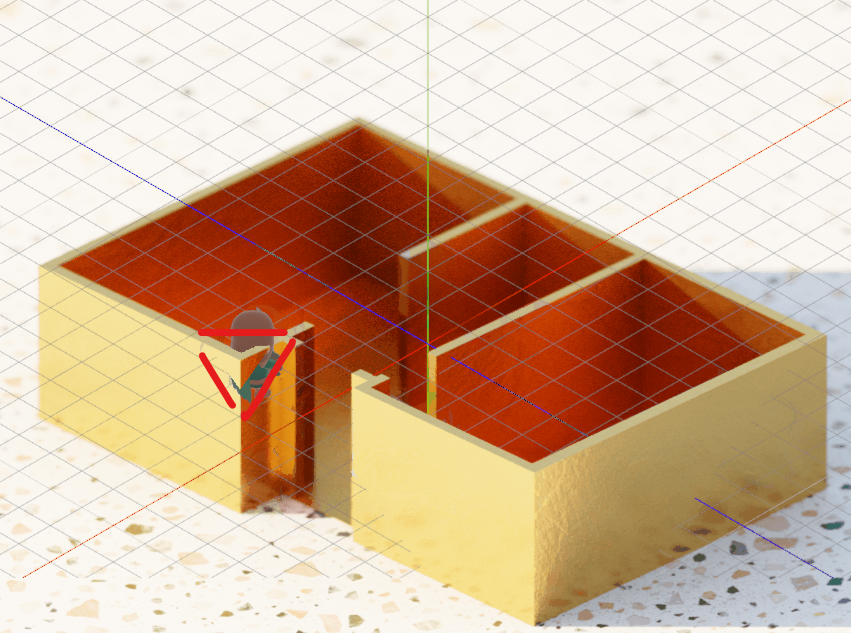
Now, I’ve seen depth maps like this before – you can create them easily in Blender, too. We made a model of a room to try it out on, here it is:
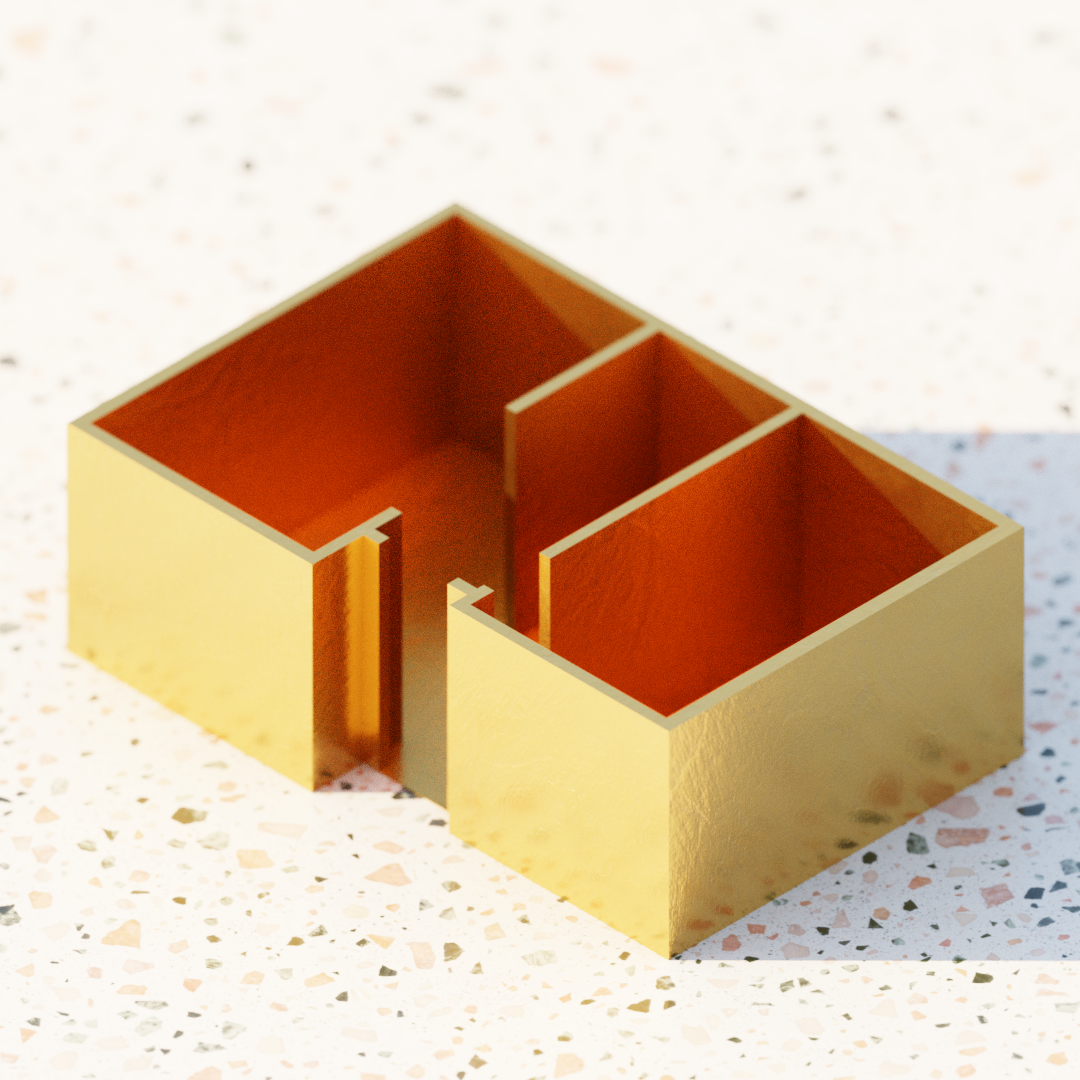
This is a single image in PNG format. I’ve angled this texture to be parallel to the camera but at a large depth, and added a 3D model that’s walking directly on the XY plane. The camera is setup to be isometric and at a 45 degree angle on every axis. With this setup, the character is always completely on top of the level image, as the level is simply all the way below the Z=0 plane on which the character is walking.
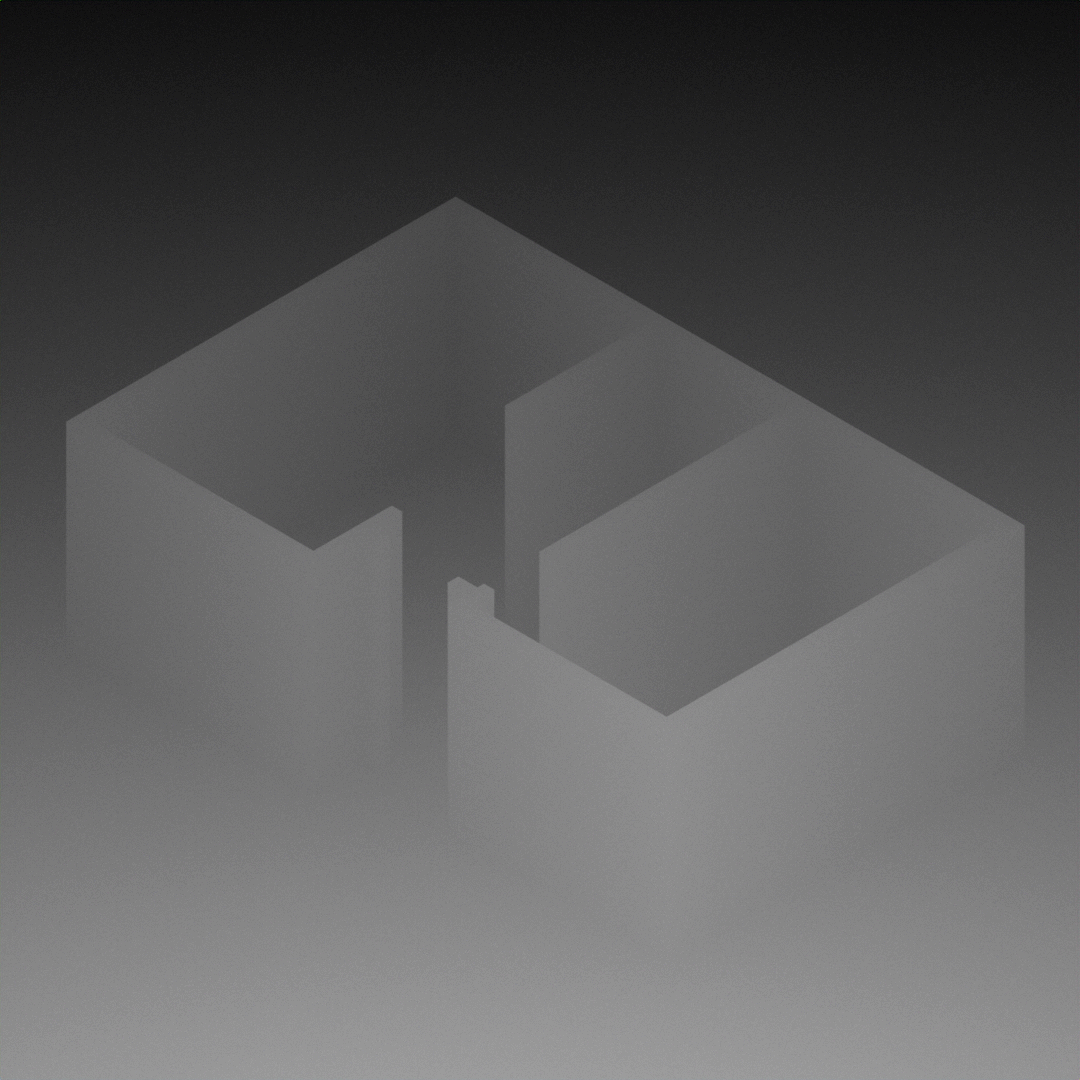
From here, we need to somehow “lift” the pixels of the image above the characters when they should occlude them. To do this, we use the depth texture. Using the blender method above, we create one like this:

This seemed pretty close to what Disco Elysium had, except inverted – they had the brighter values to the front. I felt good about this, so I went around and made a shader that simply does the following:
- Instead of drawing the texture at its regular depth given by the projection, put it at the depth goverend by the depth map instead. In OpenGL, I think this would have been as simple as
gl_FragDepth = sample(...).
Alas, this here didn’t work — I couldn’t really find a way to do it in WGPU, so I changed it to something similar but different:
Render the level texture as is and then run a shader on the characters! Sample the depth texture at the current position and check if the actual depth of the character is lower than the value from the sample. If this is the case, then our texture is closer to the image, so the pixel on the character can be discarded. Otherwise, draw it.
This sounded nice but I still couldn’t get it to work. I’m still trying to fix it as we speak — I think it’s just my lack of skill with WGPU and not some deeper reason for failing.
However, another shader idea came to mind as a quick hacky kind of thing to prove that the concept can work! I’d send in the player’s depth (where their feet are) as a uniform variable, and then choose to change the depth of the level texture at points lower than that. This one started producing results fast!
But notice the cutout angles – they’re all very telling of what we’re doing wrong…
It’s pointing at the camera! Our depth testing is camera-pointed. Our depth is dependent on the camera. When we talk about depth in this kind of perspective and game, usually we mean the XY plane depth, and NOT actual camera Z depth. We want the character’s feet to be at the same depth as the basis of the wall, and judge based on that.
Let’s take a wall for example. Picking a random spot at the base of the wall, every pixel of the wall going straight up should have that exact same depth value – this wall sample is at the same XY position, after all. This isn’t what our depth map is doing, as the Blender video explained it. To make it work wasn’t hard, however, I just figured out how to make shader nodes in Blender and made it do the following:
For some point P(x, y, z), take the distance from the camera to the point (x, y, 0) and write it into P‘s place in the depth map.
This gives us a different depth map than before:
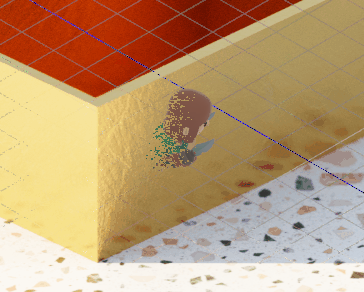
When you insert it into the test, you now get something FAR cooler:
There are some weird artifacts at points where the depth was clearly wrong (also, it’s at this point that I noticed that my perspective was all wrong and the image is scaled horizontally):
But for the most part, we got the things we wanted – the characters are invisible behind walls, and they occlude the floor. This is a great start and very promising method, except that it’s a total hack and can be used only if you are willing to have either…
- exactly one character in the world
- all the characters at the same depth.
By the way, pay attention to the floor grid – it’s giving our method away! As the character runs up, the floor dips underground as the image rises from the depths! It’s really cool to look at!
Alas, we obviously need to solve for x here and go back to what Disco Elysium was doing. They were rendering characters first and then rendering the room. This approach makes sense to me: rendering the characters first gives us all the depth information we might want; after that, we can lay down the terrain by reading the depth buffer and comparing to the depth image once, given that the characters have already depth-sorted themselves automatically. As soon as I figure out how to beat these smallish issues WGPU is giving me, I think we’re going to be striking all sorts of cool gold! If you have any inkling that might help, here’s a list of questions I think would be cool to answer:
- Can I write to the depth buffer within one camera pass, and then read that buffer with another camera? This would allow us to have a
CharacterCameraandLevelCameraand do rendering exactly as Disco Elysium, rendering the characters so that we can compare their depths and either discard or keep the texture pixels from the level. I’ve tried this but my depth buffer seems to be 0 all around with no exceptions… - What sort of value does the depth buffer hold by default? What are the expected values we get back? In the last example (the really cool one), the values I had to set to were either less than 1 or 1 or more, but it seemed that this was a binary choice and that depth either exists as “below” or “at or above” 1. Why is this?
- Is there a more Bevy way to do this than any of the ones I’ve written about here? I’d love to know!
I think there’s great potential in this method for teams like mine that have a great 2D artist but only a beginner with 3D. This way we can quickly sketch our 3D spaces and then render them with great care and in great detail, by hand. Several things become simple layers – collision (missing in the examples) becomes one or more layers that you can put into the drawing and simply not show, triggers can be drawn directly, and most of all you can use your 2D drawing tool of choice as a level editor – especially if it has an ability to drop in something like a “smart object” – a pin that can carry extra info that can easily be extracted via script. I think this might be a great boon for indie communities and really would love to push it to the max! Technical snags be damned! 😀
Leave a Reply